
When taking care of houseplants, it’s important to consider how they grow in their natural habitats to give them the best chance of thriving in your home. In the wild, epiphytic plants, like the monstera, use their aerial roots to attach to the trunks of trees and “climb” up towards the light. Even if you deem your home as an “indoor jungle”, you won’t be able to attach your monstera to a tropical tree in your living room. The next best thing is to use a moss pole!
Moss poles are sturdy moss-covered poles that mimic tree trunks and are staked in the center of a plant’s pot to help train the plant to grow upward. Climbing and vining plants such as philodendrons, monsteras, and pothos are the best choices for moss pole use. Though moss poles mimic natural tree trunks, sometimes it’s fun to add a pop of color amongst all of the green in your plant collection! In this DIY moss pole project, we turned a generic moss pole into a colorful work of art!
Follow these 5 simple steps to learn how to make a moss pole with decorative colored moss and create your own. If you’d rather watch the detailed step-by-step video, scroll to the bottom of the page!
How to Make a Decorative Moss Pole for Plants
What You Need:
-
Vining or climbing plant
-
Reindeer moss
-
Fiber active colored dye or pre-dyed moss
-
Twine or floral wire
-
Scissors
-
Large bowl
-
Gloves
Step 1:
Check to see if your plant needs to be repotted. To repot, remove the old soil and repot the plant into a container that is 1-2” larger than the original. If you’re unsure your plant needs an upgrade, check out these 5 signs it’s time to repot. After repotting, your plant may look a little floppy- and that’s okay! The moss pole will help keep it stable and upright.
Step 2:
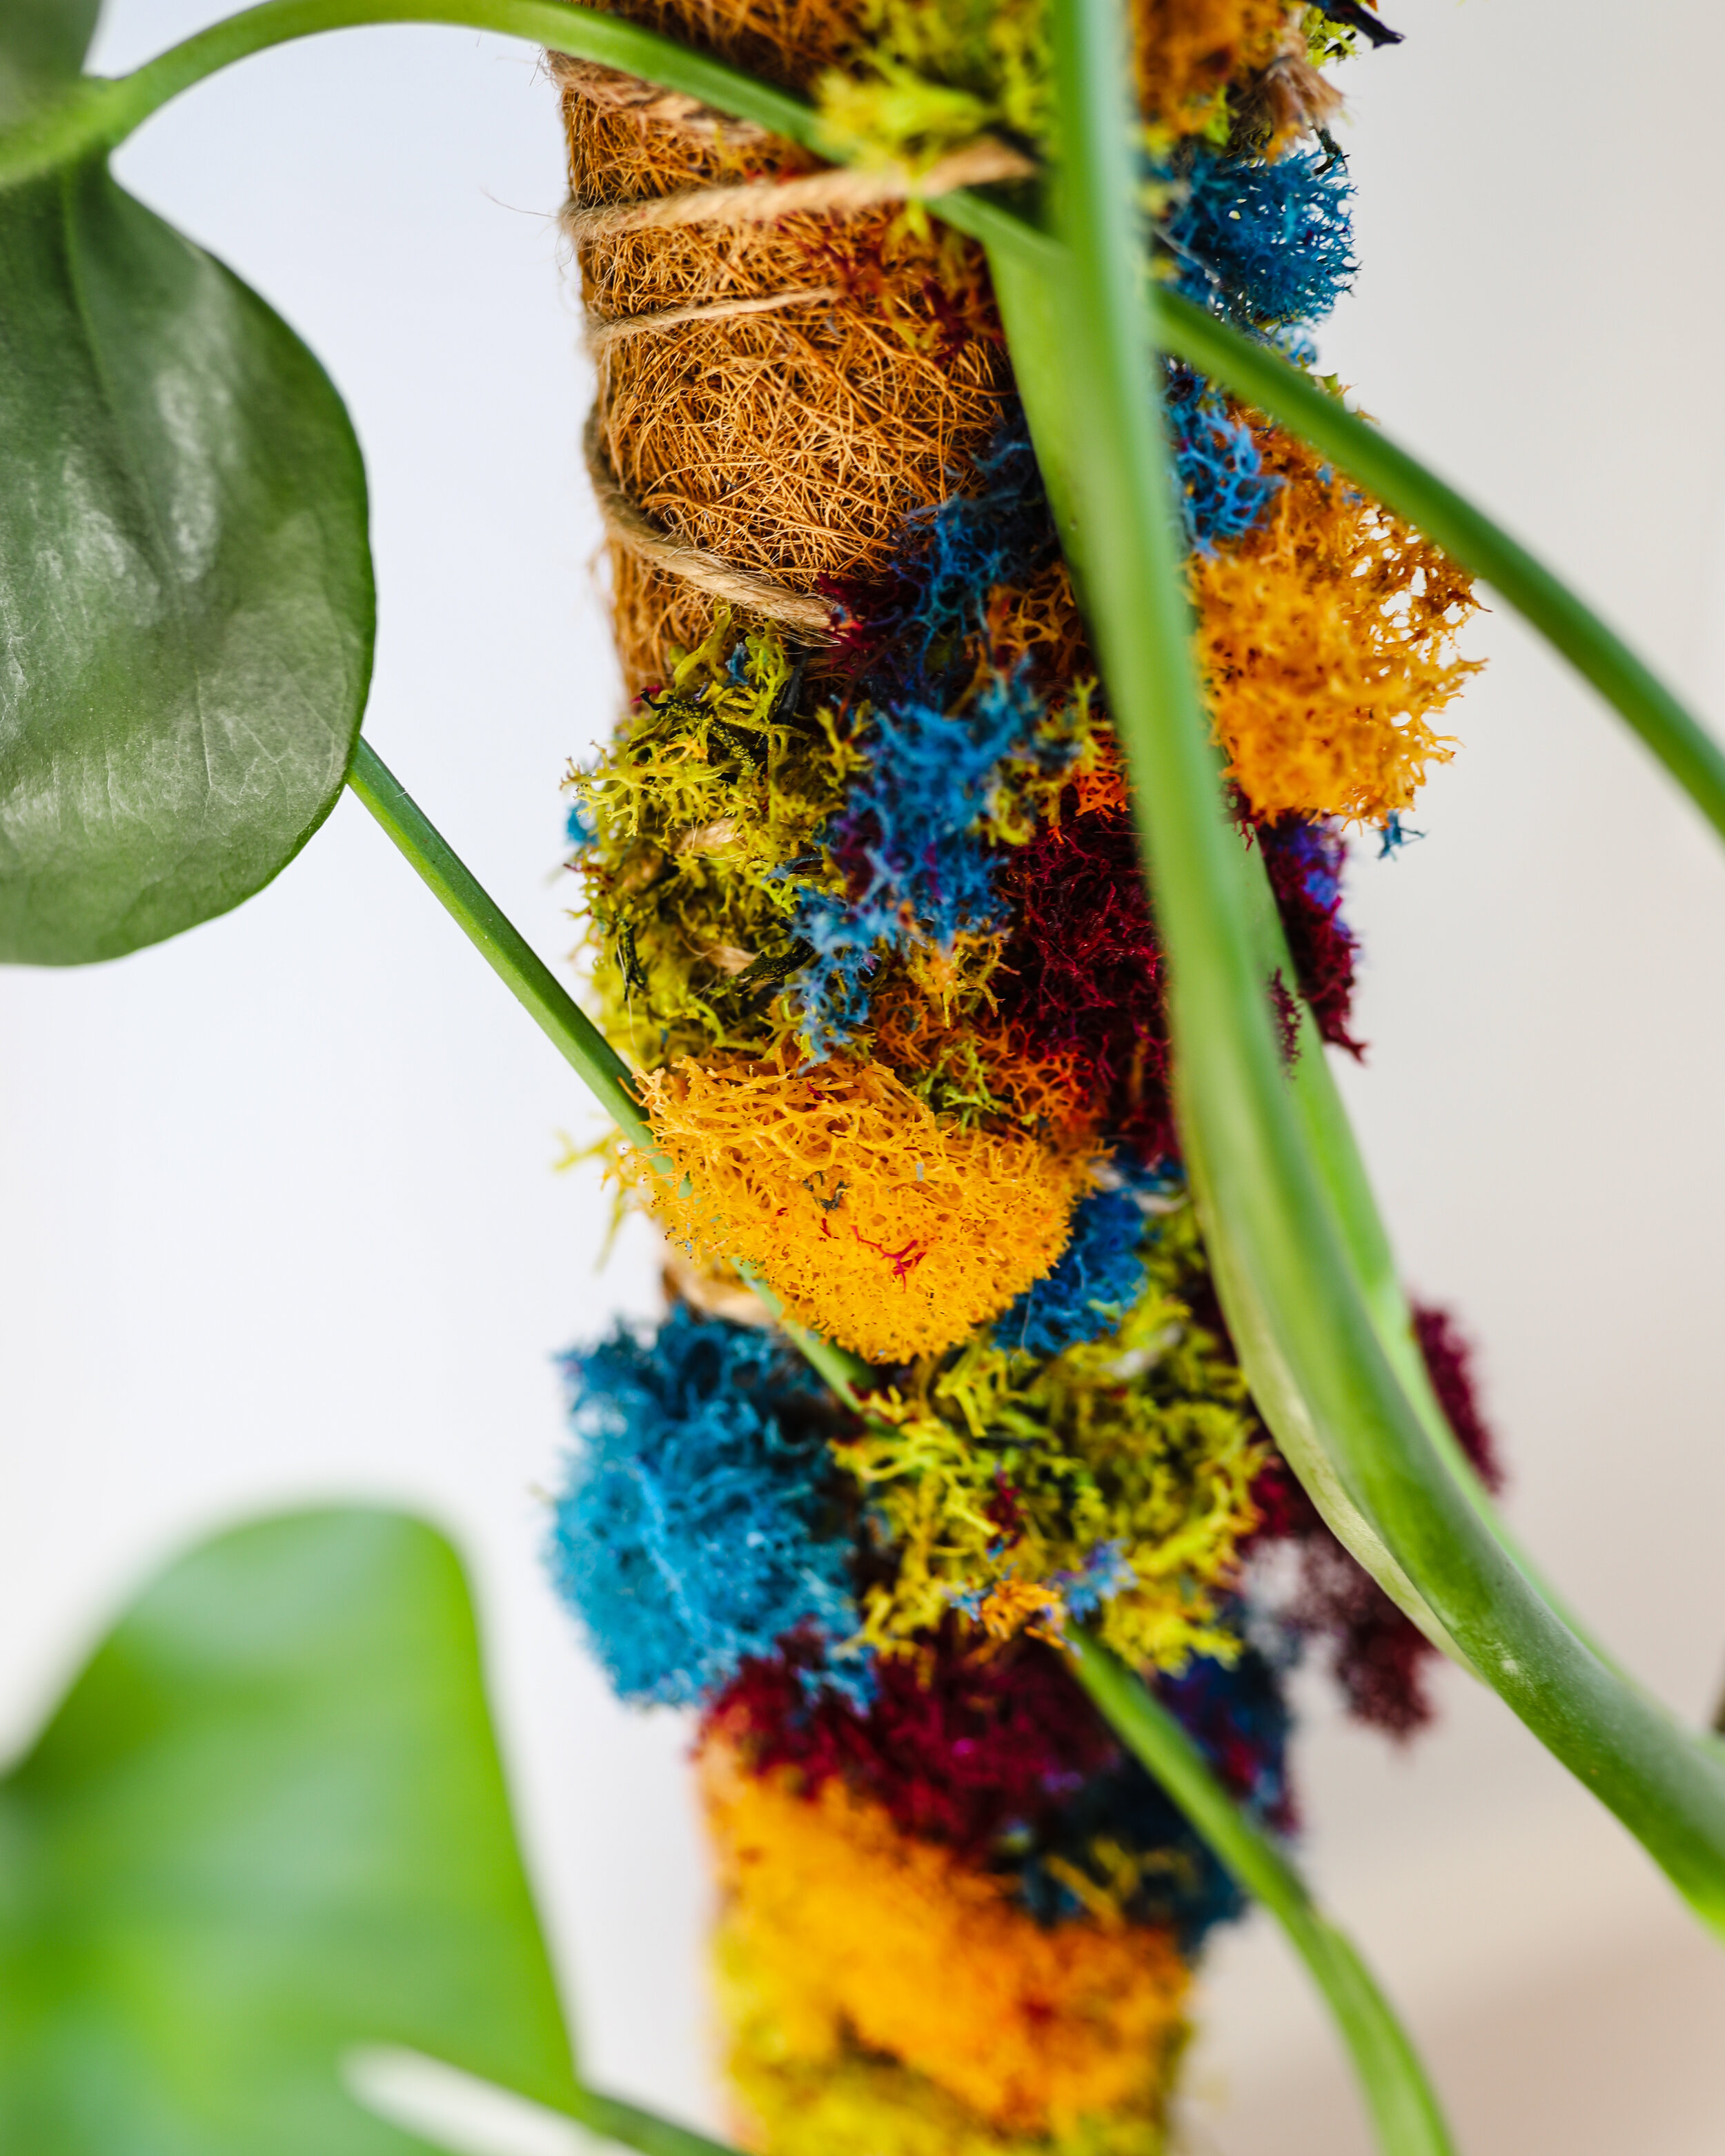
Color your moss with fiber active dye by following the instructions on the dye packaging. We immersed our moss into cool water and allowed it to soak for several hours in order to achieve a rich-colored look. If you prefer a quicker option, you can purchase pre-dyed reindeer moss at many local craft stores. Before attaching the moss to the pole, make sure that it is moistened with water.
Step 3:
Attach the colored moss to your moss pole by wrapping it with twine or floral wire. You’ll want to use your gloves for this step to avoid coloring your fingers too! Start by laying the pole on top of a large bowl and placing small amounts of moss at the bottom of the pole. Then, begin securing the moss to the pole by tightly wrapping it with twine or floral wire. The large bowl will make it easier to wrap all the way around. Slowly begin to add more moss while moving upwards on the pole.
Have fun with this step! Create an artsy pattern with different colored moss or stick with a solid color for a more subdued look. Once the entire pole has been covered, the moss should be secured enough that it doesn’t fall off when it is stood upright.
Step 4:
Drive the moss pole stake into the center of the pot. Be sure to avoid piercing any part of your plant! When the pole is inserted into the soil, add and pack down more soil near the base of the pole to make sure it is sturdy enough to stand on its own.
Step 5:
Secure your plant’s stems to the moss pole with twine or floral wire. Loosely tie parts of your plant’s stem to the pole so it is supported as it begins to grow upward.
That’s it! Over time, your plant will start to happily grow towards the light. For some bonus humidity, moisten the moss using a mister each time you water your plant. This will help mimic a natural tropical environment and keep your plant thriving!