
Bromeliad Care: Your Comprehensive Guide to Growing Healthy Plants
Welcome to the ultimate guide on bromeliad care! These vibrant tropical beauties are not only stunning in your space but also easy to care for, making them a great choice for both new and experienced plant enthusiasts.
Our guide will take you through all you need to know about bromeliad care, from their unique watering needs to finding the right lighting. Whether you want to brighten up your kitchen or living room or give a friend a gorgeous gift, these tips will help you master bromeliads and turn your thumb green.
Introduction to Bromeliads
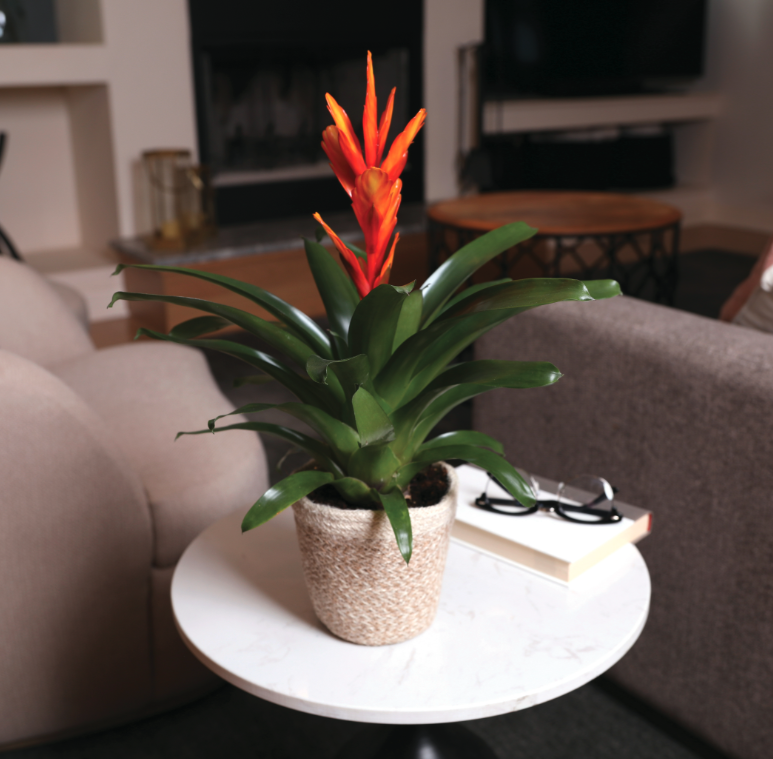
Bromeliads are part of the Bromeliaceae family, admired for their striking foliage and unique flower structures. Their signature rosette shape with a central water-collecting cup makes them stand out in any plant collection. With vibrant colors and various forms, bromeliads are a popular choice among houseplant lovers looking to add a touch of the tropics to their homes.
These plants are perfect for indoor spaces because they adapt well to different conditions and need minimal care compared to other plants. Bromeliad care indoors is simple, as they can tolerate some low light and thrive in humidity, making them ideal for homes where other plants might struggle. With low maintenance needs—like infrequent watering and minimal fertilization—bromeliads are a favorite for plant novices and experts alike.
Popular types of bromeliads include the Guzmania, known for its tubular flowers in vibrant colors, and the Aechmea, which resembles a small pineapple with long-lasting inflorescences. The Neoregalia is another favorite, with its artistic foliage patterns. Whether you love their dramatic blooms or colorful leaves, bromeliads can enhance the beauty of any indoor garden.
Essential Bromeliad Care Tips
Knowing the specific needs of your bromeliad is key to success. Different species have different light preferences. For instance, while many bromeliads enjoy bright, indirect light, others, like Guzmania, can handle lower light levels. Keep an eye on your plant; if the leaves start browning around the edges, it may be getting too much direct sunlight.
Watering is a crucial part of bromeliad care. Unlike most houseplants, bromeliads prefer water in their central 'cup' instead of the soil. This is where all of the leaves meet in the middle. Keep this cup filled and refresh the water regularly to prevent stagnation. Water your bromeliads every one to two weeks, adjusting based on the humidity in your home.
When it comes to soil, bromeliads thrive in well-draining mixes, ideal for epiphytic plants. A combination of peat, pine bark, and perlite works well. Choose pots with drainage holes to avoid water buildup, which can cause root rot. Repot every few years or when the plant outgrows its pot. You do not need to repot your bromeliad when you bring it home from the store.
Fertilizing Bromeliads
Fertilizing is an important part of bromeliad plant care. Use a diluted, balanced liquid fertilizer at about ½ or ¼ strength. Organic fertilizers like fish emulsion or orchid fertilizer are great options, providing nutrients without the risk of chemical buildup.
Timing your fertilization is key. During active growth in spring and summer, fertilize every 4 to 6 weeks. As growth slows in fall and winter, reduce this to every 8 weeks or stop altogether, allowing your bromeliads to rest. Make sure you aren’t watering your plant the same weeks you’re fertilizing, as your plant doesn’t need that much moisture.
Over-fertilizing can harm your bromeliads, causing leaf burn or stunted growth. Symptoms include yellowing leaves or brown tips. If you see these signs, flush the potting medium to remove excess salts and let your plant recover. With bromeliads, less is more when it comes to fertilizer.
Bromeliad Common Problems and Solutions
Bromeliads are generally hardy, but they can face issues. Identifying pests is crucial in bromeliad care. Look out for mealybugs, scale, and spider mites. Mealybugs leave white, cottony spots, while spider mites create sticky residue or webs. Treat infestations with insecticidal soap or neem oil to protect your plants.
Common diseases include root rot and leaf spot. To prevent these, ensure your bromeliad has good drainage, as they dislike standing water. Water only when the soil's top inch is dry and avoid getting water on the leaves to prevent fungal growth. Remove diseased leaves promptly and adjust your care routine as needed.
Propagation Techniques for Bromeliads
Propagating bromeliads is a rewarding part of bromeliad plant care. The easiest method is separating pups, or small plants, from the base of the mother plant. Wait until the pups are one-third the size of the parent before separating. This usually happens after the mother plant flowers and declines naturally.
To separate pups, twist them gently away from the parent plant. If needed, use a sterilized knife to cut any connecting roots. Ensure each pup has some roots attached for better survival. Let the cut areas dry for a day or two to prevent rot before planting.
Once separated, plant the bromeliad pups in a well-draining mix. Place them in a spot with bright, indirect light and keep the soil slightly moist, avoiding overwatering. Maintaining humidity can help them establish; consider misting or using a humidifier nearby. With patience, your new bromeliads will grow and produce pups of their own!
Frequently Asked Questions
Seasonal care adjustments are also important in bromeliad plant care. In warmer months, you can increase humidity by misting or using a humidifier. In colder months, reduce watering to prevent rot. Monitor your bromeliads; drooping or browning leaves may signal a need to tweak your care routine.
Incorporating bromeliads into your home decor can create stunning focal points. Display them in stylish pots or mount them for a natural look. Position in bright, indirect light to enhance their colors and consider grouping different varieties for visual impact.